
Guideline 2 - Know your Building / Introduction / Research
Introduction
Damage risks in historic buildings
Step-by-step assessment procedure
Assessment of state of the building envelope
Evaluation of on-site assessment
Documentation of the façade conditions
Moisture damage
Visual inspection – External façade
Visual inspection – Internal façade
Remedial actions if moisture damage is identified
Guideline for determining whether a building is suitable for internal insulation
The main goal of this guideline is to provide support to the building owner or the building owner’s consultant to determine whether a building is suitable for internal insulation.
Introduction
Damage risks in historic buildings
Brick, mortar, plaster and natural stones, the main materials in external walls of historic buildings, deteriorate when exposed to the environment. The rate and symptoms of deterioration processes are influenced by a number of variables, partly depending upon the properties of the building material itself and partly upon several environmental factors, acting separately or in various combinations.
Typical damage risks in historic buildings are:
General
o Infestation of timber components (fungus, mould, wood rot etc.)- (Photo 1, Figure 4–1)
o Moisture damage due to defect water pipes, drainage, roof covering, water installation, etc. (Photo 2, Figure 4–1)
o Moisture damage from ground water due to missing sealing, horizontal barrier, etc. (Photo 3, Figure 4–1)
External walls
o Efflorescence, salt deposits. (Photo 4, Figure 4–1)
o Corrosion of steel lintels (Photo 5, Figure 4–1)
o Erosion of masonry joints. (Photo 6, Figure 4–1)
o Spalling of external material layers (masonry, plastering etc.). (Photo 7, Figure 4–1)
o Interior surface mould growth due to low insulation standard, high moisture loads, etc. (Photo 8, Figure 4–1)
o Exterior surface algae growth e.g. due to leaking down pipes. (Photo 9, Figure 4–1)

Photo 1: Infestation of wood
Photo 2: Defect water pipes
Photo 3: Rising ground water
Photo 4: Damage due to salt
Photo 5: Corrosion of steel lintels (Source: Videncentret Bolius)
Photo 6: Erosion of joints
Photo 7: Spalling
Photo 8: Mould growth
Photo 9: Algae growth
Figure 4–1: Examples of how typical moisture related damages in buildings look like.
On-site visit to a building serves as basis for assessing whether a building is suitable for internal insulation. If relatively new documents describing the state of the building and its usage characteristics are easy accessible, these should be studied to focus the assessment. Further documents on the renovation history of the building as well as information on local conditions and climate might be relevant at a later stage, if the visual assessment indicates that driving rain load and hidden building elements need to be studied (see also ‘Building Information’).
In the case of a listed or worth preserving building, information about restrictions concerning renovation is important as well, when an internal insulation solution is to be chosen. Information can be gathered from drawings, inspection reports, etc.
Based on case studies conducted in RIBuild and found in the literature studying the hygrothermal performance of internally insulated historic buildings (RIBuild Deliverable D3.2, 2019), the following general conclusions and recommendations can be given:
The thinner the existing wall, the lower the possible damage-risk free thermal resistance resp. thickness of the added insulation system. A thin wall increases the condensation risk and the impact of driving rain on the construction.
The lower the driving rain load, the more possible insulation systems. Driving rain load depends e.g. on size of roof overhang or specific location of the building
The dryer and warmer the indoor air, the more possible insulation systems. While the performance of capillary active systems show a strong interaction with the indoor climate, the behaviour of vapour-tight systems only marginally depend on indoor climate conditions.
A humidification potential from one side of the construction (e.g. moist indoor air or driving rain) requires an equivalent drying potential on, at least, the opposite side of the construction. This could be provided with a condensate-tolerating internal insulation system or avoided with a reduction of the moisture load (improved driving rain protection).
The higher the built-in moisture, the higher the required drying potential of the construction. Insulation systems with a high build-in moisture should therefore at the best be vapour-open and capillary active.
The more vapour-tight the insulation systems are, the more caution should be paid on proper workmanship at constructive details, connections, joints, etc.
^
To top
Step-by-step assessment procedure
This guideline consists of three steps for determining whether a building is suitable for internal insulation, and what is required to make this decision (see Figure 4–2):
Visual assessment. This first step should give an overview of the extent of cracks, wet spots, rising damp etc. ‘Assessment of building envelope’ gives examples of what to look for and guides on possible remediation action in case cracks, wet spots, algea, mould growth, frost damage etc. are identified.
Collection of information about “exposed areas” of the building and its surroundings. If no cracks etc. are identified or when those identified are treated, the building owner can move on to the next step, looking at details of the building and its surroundings that describe how robust the building is (see ’Building information’). As addition of internal insulation will change the hygrothermal conditions/behaviour of the external wall, it is important to ensure/estimate that this can take place without harming the building. This step includes collection of information on the present indoor climate, the wind driven rain load, rain collection system, moisture sensitive parts, and rising ground water.
Measurements. Often, measurements are needed to decide whether the façade is robust enough to be internally insulated. Relevant methods are described in ‘Measurements’, focusing on moisture and heat/U-value. Both on-site and laboratory measurements are described.

Figure 4–2: Overview of assessment procedure of the building state
If the visual assessment, the evaluation of exposed areas and possible measurements show that internal insulation is feasible, the next step (‘applicability’) is either to move further to ’Insulation systems’, that introduces the different types of insulation systems and methods for calculation or simulation of heat and moisture transport, or to start collecting input data for using the RIBuild web tool.
Material properties such as capillary water uptake and density might give added information about the existing wall, and might be useful when considering to include accompanying measures like hydrophobization. However, it is much more important to repair cracks, as they have a much larger effect on moisture transport within a wall than whether one type or another type of brick has been used. Further, the location of a building seems to be much more important than the material properties of a specific wall (de Place Hansen & Møller, 2018), (RIBuild Deliverable D2.1, 2018).
^
To top
Assessment of state of the building envelope
Visual assessment: general activities
Visual assessment of a building must be carried out to determine whether there are any fundamental limitations to application of internal insulation. The external wall and the adjoining constructions need to be in a sufficiently good state, e.g. having no cracks, and no indication of moisture damage or presence of salt, before application of internal insulation should be considered. The main goal is to assess risk factors related to the existing wall, constructive details, boundary and initial conditions, and specific aspects of internal insulation application. It is recommended that an assessment follows a certain procedure including assessment of whether and how the building has functioned in its current state and if it has been damage-free, photo documentation of the building, and finally preparation of damage report (mapping).
Several conditions have to be present before internal insulation can be considered an option for a specific historic building, as presented in Moisture damage and typical damages. If visual assessment has identified indication of moisture damage, the moisture sources need to be identified and eliminated no matter whether it has resulted e.g. in frost damage, mould or algae growth, wood rot, salt efflorescence or is caused by rising damp. Internal insulation systems can only be applied after all measures to avoid further moisture ingress into the construction have been carried out. Further, damaged parts of the façade and the adjoining elements (e.g. woodens beams supporting the floors) should be replaced or treated as part of the renovation. Internal insulation can never be used to ‘hide’ previous damage.
Application of internal insulation could be performed in combination with impregnating the external surface of the wall with a water-repelling agent. In that case, the agent should be applied first, letting the wall dry out before installing internal insulation. How long the wall should dry depends first of all on the state and the thickness of the existing external wall, the location and orientation of the wall and the indoor climate. The guidelines do not go into detail with the potential of combining internal insulation and water repellent agents; more research is needed within this topic before integrating such recommendation. The potential benefits are at present studied in a number of projects, e.g. in Denmark and Belgium, being part of or connected to RIBuild, (RIBuild Deliverable D2.3, 2020) – which also includes a state-of-the-art, (RIBuild Deliverable D3.1, 2018) and (Odgaard, Bjarløv, & Rode, 2018).
Table 4‑1 summarises when internal insulation is applicable, might be applicable or is not recommended, based on visible damage and material properties of the existing wall. See also Table 4‑11. The indoor climate in the winter season should generally not exceed 50 % relative humidity, if it does a climate control system should be installed etc.
Table 4‑1: Assessment tool for the applicability of internal insulation, based on the presence of visual damage and material properties of the exising masonry wall (Steskens, Loncour, Roels, & Vereecken, 2013).
Ideally, the visual assessment takes place directly after a rain event, firstly to clearly recognize damage in the splash water zone and the roof drainage and its consequences, secondly to capture a visual impression of the capillary water absorption of the façade and thus its protective state.
First, it must be checked whether and how the building has functioned in its current state and if it has been damage-free. If this is not the case, the focus of the inspection is on the detection and examination of hygrothermal structural damages. This allows the consultant to recommend immediate measures for the (re)production of the functional state. In some cases, the cause of the discovered structural damage is easily eliminated, e.g. by renewal of a defective roof drainage or, initially, provisional closing of defects in the building envelope.
As part of the visual assessment, a comprehensive, clear photo documentation of the building should be created. It is generally used to document the condition of the building, including damages. It should be used to illustrate materials, layer thicknesses (photographies with a scale), details, etc. in detail. Often, existing plans and drawings does not represent the existing building; deviating wall constructions, materials, dimensions, etc. usually show up.
It is advisable during the inspection to proceed with a certain systematic procedure, e.g. from outside to inside, from the overall view to the detail, from the basement to the attic, etc., to obtain a comprehensive overview of the state of the existing constructions. In addition, describing special areas necessary for the inspection, e.g. areas where samples are taken for further investigation, holes to inspect for cavities, special structural designs not included in the design documents, location of sealing levels, imperfections and leaks, type and location of existing windows and doors, etc.
As a result, a damage report (mapping) is carried out during the visual inspection to map the actual condition of the building as accurately as possible. During the on-site inspection, the recognizable damage (such as moisture damage, salt contamination, rot, mould, algae, corrosion, etc.) and special features are documented, mapped in their position and shape and added to a elevation (drawing) of the facade. Damages are generally mapped together with in-situ moisture measurements, as this often results in correlations. Based on the damage mapping, measures to eliminate the damage or the causes of damage are derived. These measures concern the direct structural repair, for example, the repair of joints or the replacement of damaged wooden components, and the drying of the external components.
During visual assessment special attention should be paid to number of risk factors, of which some are described further in ‘Assessment of building envelope’ and some in ‘Building Information’ (in most cases indicated as a specific subsection):
1) Risk factors related to the existing wall
Constructive details
o External wall materials (plaster, brick, natural stone, wood, etc.)
o Determination of wall structures (layers, thicknesses)
o Classification of cracks (due to design or plaster)
o Survey of the surrounding buildings
o Detection of lintels, steel girders, elements penetrating the façade, acting as a thermal bridge
o Damage visible at inner surface of façade, such as mould and moisture damage in external wall corners, or at connections between window and wall (see ‘Moisture Damage’)
Walls in contact with ground / base area
o Design and condition of the splash water area, terrace connections, level access
o Groundwater situation (if applicable, groundwater depth) and surface water discharge
o Visible waterproofing levels against rising damp (horizontal barrier, vertical waterproofing and possibly existing protective layers)
2) Risk factors related to installing internal insulation
Increased condensation risk behind the exisiting wall due to lower outgoing heat transport through the wall
o Increased condensation risk with increasing capillary activity / capillary suction (addresses impact of driving rain)
Reduced inwards drying, with increased risk for frost weathering or mould growth
Misunderstanding of the different modes of operation of insulation systems
o Vapour-tight systems: main leakage sources are workmanship-related issues, e.g. a leakage in the foil layer, and design-related issues, e.g. a non-continuous air tightness layer. Consequences of vapour transport through gaps, cracks, connections etc. might be condensation, mould growth and increased energy consumption
Misjudgement of the exising construction, including properties of the historic building materials (masonry)
Underestimation of drying times before installing internal insulation, related e.g. to leveling redendering of uneven walls
Vapour ingress due to convection because of uneven historic surfaces not prepared before installation of internal insulation
3) Risk factors related to adjoining building elements
Thermal bridges (interruption of the insulation layer) by all embedded constructive details (partitions, windows, etc.) (See ‘Moisture sensitive parts’), with increasing risk of surface condensation
Floor slabs
o Condition of the ceiling constructions (visible damage, e.g. wood rot, corrosion, exposed reinforcement in concrete)
Roof
o Condition of the roof drainage system (damage to gutters and down pipes, clogged gutters, etc.)
4) Boundary and initial conditions risk factors
Climatic boundary conditions
o Temperature and humidity levels in the building, especially high humidity loads from use, and condition of ventilation system (See ‘Indoor Climate’)
o Additional moisture inputs, e.g. from the soil or a high relative humidity at the site (e.g. near water or at high groundwater level) (See ‘Rising damp’)
o Driving rain load of the building (existing constructive driving rain protection including roof overhang, roof drainage and splash water protection, external rendering, etc.)
General risk factors
o Soil moisture (groundwater, seepage water, pressing water,...) (See ‘Rising damp’)
o Internal moisture load (pipe routing, damage to enveloping surfaces, e.g. defective windows or connections and rainwater in the interior due to defects (See ‘Moisture sensitive parts’)
o Problematic connection points (surface condensation, rot, ...) (See ‘Moisture sensitive parts’)
o Execution of essential component connections (component opening may be required)
o Type and condition of the existing or former service water drainage system in the building (See ‘Moisture sensitive parts’)
o Recording of the overall condition and the general moisture load in the building
^
To top
Evaluation of on-site assessment
Evaluation of the on-site assessment in the building report should contain the following information:
Recording of the general building condition and the existing driving rain protection of the façade and plinth areas
Documentation of the condition of the outer and inner walls
o Material used, condition of the wall construction
o Condition of plaster/joints, existing coatings
o Flatness of the wall
o Special structural features (steel girders, beams and coatings, condition of components, special features of ceiling integration...)
o Documentation on position and condition of the sealing levels
o Mapping of moisture damage and loads (see example in Figure 4–3)
o Listing and location of moisture damage from
§ Ascending humidity
§ Usage features
§ Individual damage (e.g. due to waste water in the building or inadequate maintenance)
§ Defects due to defects from the enveloping surface or roof drainage
o Characterization of moisture damage
§ Visual inspection (e.g. dry rot infestation)
§ Sampling for laboratory measurement (e.g. water content)
o Documentation of the salt load

Figure 4–3: Representation and classification of the measured moisture loads in the floor plan
The results of the moisture measurements are summarised clearly and comprehensibly in a moisture status report. Its conscientious processing serves as an important basis for the calculation of the required follow-up services as well as for the further planning and execution steps.
^
To top
Documentation of the façade conditions
The protective function of a façade decreases over the years due to weathering, which can be seen in changes in strength, colour or material properties. Depending on the facade material and quality, appropriate maintenance cycles must be planned. Particularly in connection with planned internal insulation, the condition of the façade must be critically examined.
In the case of plaster facades, a facade that is no longer resistant to driving rain can be well achieved by crack filling and repainting the surface and, if necessary, by partially or completely applying new plaster. These services are usually quite manageable and calculable.
The preparation of a facade renovation concept makes sense if the renovation effort cannot be easily estimated due to the existing complexity. This applies, for example, to natural stone facades or brick facades without plaster with extensive obvious damage, the comprehensive recording and assessment of which would go beyond the scope of an initial building / moisture condition analysis. For this purpose, a more detailed survey of the individual damage to the façade is mapped and classified (see example in Figure 4–4). Structural features of the façade and their effects are presented. Existing cracks are mapped and classified. On this basis a more exact calculation of the costs can be made; necessary renovation times and dependencies can be planned more concretely during the construction process.


Joints defective
Plaster damage to pointed arches
Algae
Efflorescence
Damage to clinker bricks
Cracks to be repaired
Plant growth
Figure 4–4: Representation of the existing damage pattern on the façade.
Recommended measures
Immediate or safety measures to be taken
Recommendations for dehumidification as a function of moisture load and horizons
Dealing with stock salts
If necessary, display of component areas to be removed
Explanation of necessary and recommended waterproofing measures, notes on location and overlapping of levels.
Moisture damage
The presence of excess moisture in building constructions can cause serious harm, and is undesirable. High levels of moisture can result in several types of deterioration, and reduce the service life of building components. Moisture induced damage include e.g. mould growth, wood decay, and frost damage, and furthermore moisture in porous materials can increase the thermal transmittance and thereby the heat loss through a wall. Moisture can appear on an external façade in the form of darkened areas indicating wet spots. Furthermore, damp areas can be revealed by the damage it causes both internally and externally, e.g. paint peeling/blistering, frost damage, salt efflorescence, mould growth, signs of fungal attacks or algae growth. Figure 4–5 illustrates examples of moisture in façades, and moisture related damages both internally and externally.
Dark, moist areas visible on external wall (1) and internal wall (2)
1

2
Peeling of paint on external wall (3) and internal wall (4)

3
4
Salt effloresence on external wall (5) and internal wall (6)

5

6
Frost damage in masonry on external wall (7) and mould growth on internal wall (8)
7

8
Figure 4–5: Examples of moisture in constructions and related damage.
Application of internal insulation increases the risk of moisture accumulation and moisture damage as internal insulation reduces the drying potential of the existing wall, as well as the temperature. For this reason, any signs of excess moisture in the walls should be investigated and remedied prior to application of internal insulation. There are many possible moisture sources, including rising damp, precipitation, infiltrating surface water, and defective plumbing, and the remedial measures should be adapted to limiting the moisture source, where after the wall can dry out.
Table 4‑2 includes what to look for and where, when determining the suitability of the building in the present state for internal insulation with regard to moisture in the walls. To identify possible defects and moisture damage in a building, a visual inspection should be conducted both internally and externally. Any signs of moisture accumulation or moisture induced issues should be registered and remedied prior to application of internal insulation.
Table 4‑2: What to look for, and where with regard to moisture damage
^
To top
Visual inspection – External façade
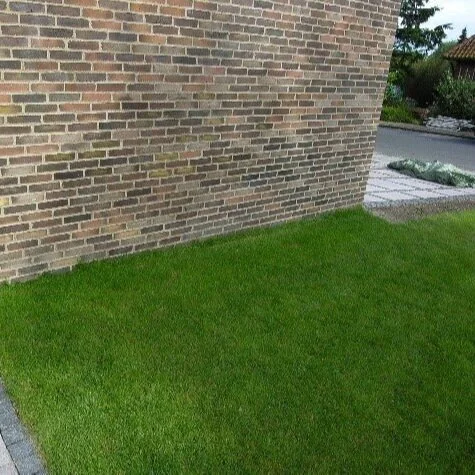
The external façade can provide basic information on whether a building is subjected to moisture accumulation or not. Moisture accumulation can appear as wet spots/darkened areas in a façade, as seen below in Figure 4–6. The examples illustrate that moisture accumulation in the masonry can appear anywhere on the façade or gable.
A
B
C
D
E
F
Figure 4–6: Examples of stains and wet spots. A: moist areas on rendered masonry façade, B: wet spots on masonry façade, C: moisture accumulation at top of façade gable, likely due to precipitation, D+E: local defects causing concentrated moisture accumulation, F: moisture accumulation near the plinth, likely due to rising damp
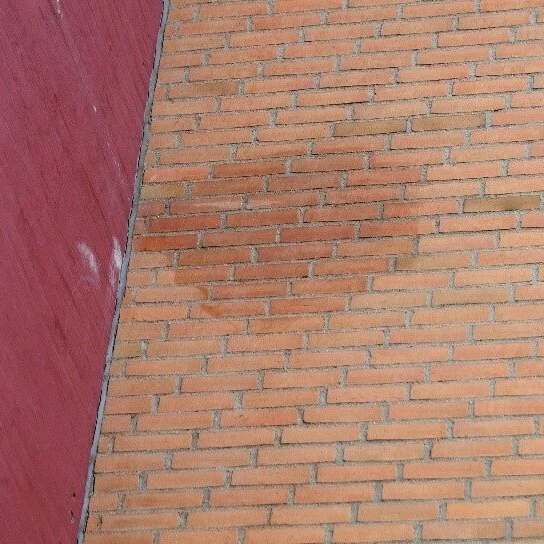
Moisture accumulation can also appear in the form of the damage that it causes. If moisture (e.g. from high internal moisture loads, rising damp etc.) is trapped behind a diffusion tight paint, the drying is blocked and causes the paint to blister, and eventually scale and peel off. The peeling of paint can also be caused by salt efflorescence. Salt efflorescence is when soluble salts from the masonry are diluted in water travelling through the pore structure of the masonry. When the moisture reaches the surface for evaporation, white, powdery salt crystals remain behind on the surface. Algae growth can appear as light to dark green coatings on a façade, if optimal conditions of moisture, temperature and lighting occur. Usually northern bound facades are more subjected to algae growth. Frost damage occurs when a moist façade is subjected to freezing and thawing cycles. As water expands up to 9% when freezing, moisture in the pore structure causes stress within bricks or mortar, and can cause spalling and crumbling of both. Furthermore, when masonry has started to deteriorate due to frost, the outer-most part of the brick/mortar is disintegrated, leaving the remaining masonry more susceptible to water absorption, and thereby the rate of frost damage is increased. Examples of visible damage caused by moisture, are shown in Figure 4–7.
Blistering, peeling, scaling of paint
Salt efflorescence and algae growth
Frost damage to masonry and render
Deterioration of mortar joints
Figure 4–7: Examples of visually apparent moisture induced damage of external façades.
^
To top
Visual inspection – Internal façade
Attention must also be given to the internal surfaces of external walls, as moisture accumulation may become visible here rather than externally. Like the case for the external inspection, moisture can appear visually as darkened areas on the internal surface. Furthermore, paint deterioration, and deterioration of internal render can be caused by moisture and salt efflorescence as the case for external paint/render. Examples are provided in Figure 4–8.
Moist areas on internal surfaces
Paint and render deterioration
Salt crystallization
Figure 4–8: Examples of visually apparent moisture and moisture induced damage of internal façades.
In addition to the moisture induced damage similar to the damage of external façades, the internal construction elements are subjected to further risk of damage caused by moisture. This includes the risk of mould growth, and wood deterioration and deformation. Mould growth can develop on internal surfaces with favourable conditions (temperature and relative humidity), and when organic material is present (e.g. wall paper but also dust). Mould growth can be hidden behind heavy furniture placed against the wall, or even wall-hanging decorations. Furthermore, the risk of development of wood-decaying fungi is present in the case of wooden elements becoming moist for a longer duration of time. Finally, some construction elements may be subjected to deformation when exposed to moisture. Thus, this is also a sign of excess moisture in the construction. Illustrations of mould, wood decay and deformation are gathered in Figure 4–9.
Mould growth
Decaying wood
Deformation of (wooden) elements
Figure 4–9: Examples of visually apparent induced damage of internal façades.
^
To top
Remedial actions if moisture damage is identified
Remedial actions might be complicated, dependendent on the cause for moisture damage. If a broken or leaky downpipe is the cause remedial actions are quite simple (replace the downpipe), but if it is caused by rising ground water, remedial actions are complicated.
Initially the moisture source should be found, and the cause for the moisture accumulation remedied. Hereafter, potential moisture damage should be fixed, and the affected construction parts should be dried out. The sections below describe how to treat external masonry and components prior to application of internal insulation, and after the moisture source has been eliminated, following the approach given in Figure 4–10.
Figure 4–10. Approach for remedial action of an external solid wall. First, the cause for moisture ingress should be identified and stopped (if any), then the facade should be cleaned, removing loose facade components. If there are cracks, their cause should be identified and handled before any other measure. Dependent on the extent and size of cracks, if their cause cannot be identified, renovation of the building should not be carried out.
Stop the source for moisture damage
The first step is to locate and stop the moisture source causing damage, as described in the ‘remedial actions’ parts of ‘Moisture damage’ and ‘Typical damages’. For instance, if the cause for moisture damage is rising damp, defective pipes, lack of drainage etc. should be handled before considering internal insulation.
Facade cleaning
Before facade maintenance and renovation work is carried out, or before measures are taken to provide the necessary driving rain protection (sealing work), a facade cleaning is usually necessary, during which even loose facade components are removed. The aim is to maintain a firm, cleaned facade surface, free of algae, salts, soot particles, etc. It also makes it easier to get a visual impression of the condition of the façade.
Surfaces of brick facades should be cleaned as gently as possible not to damage the burning skin. A cleaning without chemical additives is often sufficient, and therefore the use of a hot steam jet process is recommended, being also the simplest method. Depending on the conditions found, special surfactants, algae dissolvers, etc. can be used in individual areas.
The cleaning agents used must be compatible with each other and with any eventual subsequent hydrophobic impregnation. The surfactant solution must be collected and disposed of. This must be planned in the cost estimate.
It is recommended to test a suggested cleaning method on a sample area before choosing the specific method for the whole façade.
Crack repair
Cracks in the façade indicates that the protective function of the building envelope is no longer intact. If the moisture load results in cracks related to frost, serious damage can occur. If not only the facade surface is affected by cracks, but also the construction itself, static problems can also occur. Therefore, crack repair is important when preparing brick masonry for installing internal insulation.
To identify how to repair the observed cracks, their causes need to be identified; are they structural, subsurface or material-related. And are they still developing or not. This includes recording the crack depth, width, length and the course of the crack, eventually over time. Depending on the type and spread of the cracks, the proposals for repairing the cracks can range from replacing the grout to injecting and using stainless steel spiral anchors.
In the latter case, spiral anchors are dimensioned to prevent the movement of existing cracks and the formation of new cracks in the masonry according to static specifications (anchor diameter, anchor length, number and laying of anchors).
If the cause for cracks cannot be identified, no further attempt to add internal insulation should be pursued.
Repairing of joints
If the bond between brick or stone material and the joints is no longer sufficiently stable and weather-resistant with intact bricks/stones, the joints should be repaired. This is especially important if the joints show cracks and flaws and in all areas where salt efflorescence and algae deposits are visible.
The following steps are necessary:
Removal of defective joints to a depth of approx. 20 mm, without damaging the bricks
Re-pointing with a repair mortar adapted to the construction in terms of strength, elasticity and colour
Post-treatment, forming of the joint
In the splash water area (plinth are) if necessary: grouting with a mortar that is resistant to salt exposure coming from the use of salt on the pavement etc.
If the use of water-repellent agents is considered as part of reparing the joints, instead of using a mortar containing a water-repellent agent it is advisable to impregnate the whole wall. If only the joints are treated it will be become less obvious how and where moisture enters and is transported in the wall. Further, a surface treatment is much more efficient in regard to reducing water uptake than adding a water-repellant agent to the repair mortar.
Criteria for replacing parts of the existing facade
Damaged bricks/stones in the façade must be replaced with similar materials. Preferably, by using well-preserved facade materials available on-site, e.g. as a result of widening or supplementing openings as part of the renovation. Otherwise suitable replacement bricks/stones are to be used.
To select or produce suitable replacement bricks, the following properties of the existing masonry materials are recommended to be taken into account and verified:
firmness
bulk density
water absorbency
frost resistance
content of water-soluble salts
type of execution (solid brick, perforated brick)
surface and colour
The replacement stone must be of the same type as the existing. If this is not considered, differences can become noticeable very fast at the façade and damage can occur because of differences in moisture absorption.
The replacement mortar to be used should also resemble the existing mortar as closely as possible, although different or changed weather conditions must also be taken into account.
Component drying
Dependent of the moisture load, especially if it is caused by leaky pipes, rising damp etc., it might take quite some time to dry the existing wall. It is advantageous if the building or the affected construction areas can dry with natural ventilation. The winter season is best suited for this, as the absolute moisture content of the outside air is lower than that of the indoor air. By means of a controlled air exchange, the warm, moist indoor air is replaced by cold, dry air. The summer months are not or only very limitedly suitable for this purpose.
Ventilation can also be controlled with simple fan units in combination with outdoor and indoor humidity sensors, so that ventilation only takes place if the external absolute humidity content is lower the internal. If necessary, additional drying devices can be used.
If sealing of areas in contact with the ground from the outside is planned, drying should be carried out from the outside by exposing the outer wall areas at an early stage. The summer season is well suited for this, as there is a good drying potential due to the warming up by the sun. In this case, drying the wall from the outside, sealing the façade at the outside should only be introduced at a later stage. The exposed areas must be protected from water.
Sealing works
Finally, it should be considered to seal the façade, e.g. by using water repellent agents (hydrophobization). It should be noted that after a sealing measure the remaining drying potential is only possible in one direction. For further information about hydrophobization refer to (RIBuild Deliverable D2.3, 2020).
^
To top